Guide to installing basic irrigation for UK gardeners
If you have ever stood in the garden on a dry July evening, hose in one hand and a slightly stressed expression on your face, you already know why irrigation matters. A well-planned system takes the guesswork out of watering, helps plants settle in faster, and saves time when the weather turns changeable, which it often does in the UK. This guide to installing basic irrigation for UK gardeners walks you through the practical basics: how it works, what to buy, how to fit it, what to avoid, and when a simpler setup is actually the smartest choice.
You do not need a huge budget or a specialist background to get started. You just need a sensible plan, a few reliable parts, and a clear idea of what your beds, borders, pots, or lawn actually need. Let's get into it.
Why Guide to installing basic irrigation for UK gardeners Matters
Basic irrigation is not just about convenience. It is about watering consistently, at the right spot, and in a way that matches your garden rather than your guesswork. In the UK, that matters because the weather can swing from damp to bone-dry surprisingly fast. One week the soil is holding moisture nicely; the next, your containers are flopping over by lunchtime. Typical, really.
For many gardeners, watering by hand works fine for a while. But as soon as you add raised beds, hanging baskets, allotment plots, or a busy work routine, a simple watering routine starts to fray. Plants do not need random splashes. They need steady moisture at root level, especially while establishing. Irrigation helps reduce that stop-start pattern.
It also helps with quality. Tomatoes, salad leaves, young shrubs, and newly planted perennials all perform better when watering is regular. Drying out and then soaking heavily is hard on roots. So is repeatedly wetting the foliage late in the day. A basic irrigation setup solves both problems in one go.
If you already invest in broader garden care, irrigation fits neatly alongside regular upkeep such as garden maintenance and seasonal improvements through landscaping. It is one of those behind-the-scenes upgrades you barely notice once it is in place, which is usually a good sign.
How Guide to installing basic irrigation for UK gardeners Works
At its simplest, irrigation is a controlled way of delivering water from a source to the parts of the garden that need it. The core idea is straightforward: move water through a hose, pipe, drip line, or sprinkler, then release it either slowly near the roots or more broadly across an area.
The main difference between basic systems is how they apply water:
- Drip irrigation sends water slowly to the base of plants.
- Soaker hose lets water seep out along the length of the hose.
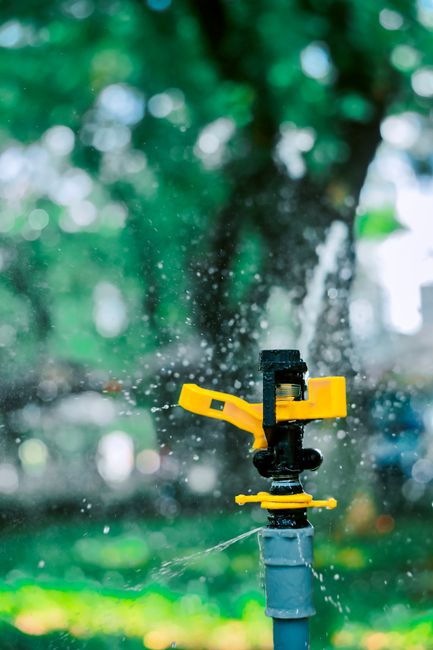
- Micro-sprays or sprinklers spread water over a wider area.
- Manual timer-assisted setups let you water automatically at set times.
For UK gardens, drip and soaker systems are often the best starting point because they are efficient and easy to control. They also reduce water landing on paths, fences, and leaves. That said, a small lawn or mixed border may benefit from a sprinkler in one section and drip lines in another. The right mix depends on the planting, not on fashion.
A basic system usually includes a water source, a connector, some tubing or hose, emitters or perforations, and often a timer. The water pressure from your tap or butt-fed pump determines how well the system runs. Too much pressure and fittings can pop. Too little and the last emitter in the line may barely trickle. Getting that balance right is half the job.
To be fair, you do not need to overcomplicate it. Most small gardens need a simple layout, a couple of zones, and a short test run before you leave it to do its thing.
Key Benefits and Practical Advantages
The big benefit is consistency, but there are several other wins too.
- Time savings: Once installed, you stop hauling a watering can around every evening.
- Better plant health: Roots receive more reliable moisture, especially in warm spells.
- Less waste: Water goes where it is needed instead of evaporating on paving or running off.
- Cleaner foliage: Drip systems keep leaves drier, which is often preferable for many garden plants.
- More flexibility: You can water borders, containers, or a veg patch in different ways.
- Less stress on busy days: If you are away for a weekend, the garden is less likely to suffer.
There is also a quieter benefit: better observation. When your irrigation is set up well, you begin to notice which beds dry faster, where the soil is poor, and which pots are always thirsty. That sort of knowledge is gold. It makes you a better gardener without really trying.
Practical takeaway: the best basic irrigation system is not the most expensive one. It is the one that matches your garden layout, water pressure, and the way you actually use the space.
Who This Is For and When It Makes Sense
This guide is for home gardeners who want a dependable, low-fuss watering solution without moving into fully automated or commercial systems. If any of the following sound familiar, irrigation is probably worth considering:
- You have a vegetable patch that dries quickly.
- Your hanging baskets look fine at 9 a.m. and miserable by 4 p.m.
- You are away from home regularly.
- Your garden has awkward corners that are easy to miss by hand.
- You are tired of watering in a hurry and not doing it properly.
It is especially useful for newly planted shrubs, border plants in sunny spots, container gardens, and any garden with free-draining soil. Sandy soil, shallow raised beds, and south-facing areas can dry out fast, even in a British summer that looks cloudy from the kitchen window. Then the sun comes out properly and everything changes, usually at the worst possible moment.
It may be less useful for tiny gardens where hand watering is genuinely easier, or for spaces that change constantly with pots being moved around. In that case, a simple hose set-up or a few well-placed watering cans may be enough. There is no shame in keeping it simple. Honestly, simplicity often wins.
If you are already planning wider improvements, irrigation can work well alongside garden clearance or after a redesign through landscape gardening, because both make it easier to route lines neatly and bury or hide them where needed.
Step-by-Step Guidance
1. Map the garden first
Start by looking at the space as zones rather than as one big garden. Which areas dry fastest? Which plants need the most regular moisture? Which spaces are full sun, partial shade, or sheltered by walls? This is the bit most people skip, and then they end up overwatering one corner while another stays bone dry.
Draw a rough sketch on paper. Mark taps, water butts, beds, containers, and lawn sections. You do not need architectural precision. Just enough to stop guessing later.
2. Choose the right irrigation type
For most UK gardeners, the first decision is between drip, soaker, and sprinkler. If you are watering beds, borders, or veg beds, drip or soaker is often the better choice. If you need to cover a larger, more open space, a sprinkler may be more practical.
If your garden includes mixed needs, you can combine methods. A veg bed may use drip lines while a lawn edge uses a micro-sprayer. That is perfectly normal. In fact, it is often smarter than trying to make one system do everything.
3. Check your water source and pressure
Before buying fittings, think about where the water is coming from. Mains water offers steady pressure, but a water butt or tank may need a different approach. Low-pressure gravity-fed systems behave differently from tap-fed ones, and that affects how many emitters you can run at once.
If you are unsure, keep the first setup small. One zone. One bed. Test it. A lot of headaches are avoided by not trying to water half the garden on day one.
4. Gather the parts
For a basic installation, you will usually need:
- hose or irrigation pipe
- connectors and tees
- end caps or blanking plugs
- drippers, emitters, or soaker hose
- a timer, if you want automation
- clips or stakes to hold the pipe in place
- a filter, especially if using a water butt
- a pressure reducer if recommended by the system
5. Lay out the line loosely first
Put the pipe in place before fixing anything permanently. Let it sit where it naturally wants to go around beds, corners, and pots. This dry run helps you spot awkward bends and places where you may need an extra connector. It is a lot easier to adjust now than after everything is clipped down and stubbornly refusing to budge.
6. Connect and secure the system
Once you are happy with the layout, connect the pipe, attach the emitters, and secure everything with stakes. Keep fittings above soil level where possible, especially in heavy ground that gets muddy. Run the pipe neatly, but do not make it so tight that it kinks. Irrigation tubing has a mind of its own sometimes.
7. Flush the system before use
Before you rely on it, flush the line to clear dirt, grit, or small debris. This is a tiny job that prevents much bigger frustrations later. Emitters can clog surprisingly easily, particularly if the water source is not perfectly clean.
8. Test the coverage
Turn the water on and check every section. Are the first emitters flooding while the last are barely dripping? Are pots actually getting wet, or is most of the water landing on the path? Adjust spacing, pressure, or flow rate until the coverage makes sense.
You may need to watch it for a full cycle rather than just a quick glance. A five-minute test can miss a lot. Ten or fifteen minutes tells you far more.
9. Set the watering schedule
Early morning is usually the most efficient time to water because less moisture is lost to evaporation. Evening can work too, but avoid leaving foliage wet overnight where possible. For UK gardens, schedule based on weather, soil type, and plant stage rather than on a fixed habit that never changes.
As a rule, newly planted areas need more frequent watering than established beds. Containers dry out faster than borders. Clay soil holds water longer than sandy soil. These are simple truths, but they make all the difference.
10. Review after the first week
After a few days, look for signs of under- or overwatering. Yellowing leaves, puddling, or dry patches mean the system needs tweaking. A basic irrigation setup should be adjusted, not ignored. Gardening rarely stands still, and your watering plan should not either.
Expert Tips for Better Results
Here are the small improvements that make a simple system work far better than most first-time setups.
- Group plants by water need. Put thirsty plants together if you can. It keeps the irrigation schedule cleaner and easier to manage.
- Mulch before you judge performance. Bark, compost, or other organic mulch helps the soil hold moisture and reduces evaporation. A good layer changes everything, really.
- Use shorter runs where possible. Long runs can lose pressure and become uneven.
- Keep emitters near the root zone. Watering the wrong spot defeats the point.
- Check fittings after warm weather. Heat can expand some materials slightly, which may loosen connections.
- Label zones if your setup is larger. A small piece of tape now saves head-scratching later.
One thing experienced gardeners often say, quietly and with a bit of a shrug, is that the system should be boring. Boring is good. Boring means it works without fuss. If you are constantly adjusting it, something is off.
Another useful habit: keep an eye on the garden in the first hour after watering and again the next day. That tells you whether water is actually soaking into the root area or simply sitting on top. A quick peek can save a lot of plant stress.
Common Mistakes to Avoid
Most irrigation problems are not dramatic. They are just small errors repeated often enough to cause trouble. Here are the usual suspects.
- Trying to water everything the same way. Pots, borders, and lawns do not behave alike.
- Skipping the pressure check. This leads to weak flow or bursting fittings.
- Using too many emitters on one line. Flow drops off and the far end suffers.
- Leaving pipes exposed where they snag. Foot traffic and spades are not kind.
- Forgetting filters. Especially important with rainwater or a water butt.
- Setting and forgetting forever. Gardens change. So should the system.
Another mistake is overwatering because the system is automatic. Automatic does not mean perfect. If the weather turns wet, or if the soil is already holding moisture, you may need to shorten the schedule. Let's face it, British weather loves to make a plan look silly.
If you are working on a bigger garden refresh, combining irrigation with seasonal tidy-up work such as lawn mowing or hedge trimming can help keep access clear so you are not forcing tubing through overgrown corners.
Tools, Resources and Recommendations
You do not need a shed full of specialist kit, but a few basic tools make installation much smoother.
| Item | Why it helps | Best for |
|---|---|---|
| Secateurs or scissors | Cutting tubing cleanly | All systems |
| Measuring tape | Planning pipe lengths accurately | Border layouts and runs |
| Spade or hand trowel | Lifting soil for neat placement | Part-buried lines |
| Pipe stakes | Preventing movement and kinks | Beds, borders, veg patches |
| Filter | Reducing blockages | Water butts and tank-fed systems |
| Timer | Automating watering times | Busy households |
If you are choosing between products, focus on compatibility rather than chasing the biggest kit list. Match the tubing size, fittings, and pressure rating. If parts do not fit together properly, the whole thing becomes an expensive tangle.
It can also help to think beyond irrigation alone. Good soil preparation, mulching, and regular upkeep all work hand in hand. For example, areas that are being updated through decking services or a broader garden redesign may need a fresh watering plan afterwards, because hard landscaping changes where water sits and where it runs off.
If you are planning a more sustainable approach, look at recycling and sustainability ideas for the garden too. Reusing rainwater where appropriate, reducing runoff, and avoiding wasteful watering all sit nicely together.
Law, Compliance, Standards, or Best Practice
For most domestic gardens in the UK, basic irrigation is not a heavily regulated activity in the way some commercial systems are. That said, good practice still matters. If you connect to mains water, use fittings and backflow protection appropriate to the system so you do not create contamination risks. If you are unsure, ask a qualified installer or check the guidance that comes with the equipment. It is one of those areas where a cautious approach makes sense.
There are also practical responsibilities worth taking seriously:
- Do not waste water unnecessarily during dry periods.
- Make sure hoses, pipes, and timers do not create trip hazards.
- Keep electrical timers or pumps protected from the weather.
- Follow the manufacturer's instructions for pressure, filters, and installation.
If your garden is part of a shared space, a block, or a managed property, check whether there are local rules about external taps, runoff, or visible fittings. In some places, neatness and access matter as much as the irrigation itself. On the safety side, it is sensible to pair your planning with the principles in a provider's health and safety policy and insurance and safety approach, even if you are just doing a modest domestic job.
Best practice in a home garden is simple: use the least complex system that still gives reliable coverage, keep it maintainable, and review it at least once per season. That is usually enough.
Options, Methods, or Comparison Table
If you are not sure which method to start with, this comparison may help. There is no perfect universal answer. It depends on the plants, the layout, and how hands-on you want to be.
| Method | Best for | Pros | Cons |
|---|---|---|---|
| Drip irrigation | Beds, borders, veg patches | Efficient, targeted, reduces waste | Can take time to set up neatly |
| Soaker hose | Straight rows, informal borders | Simple, affordable, easy to install | Less precise, may wear unevenly |
| Micro-sprinklers | Small lawns, mixed planting areas | Good coverage over a wider area | More evaporation, more overspray |
| Timer-based hose system | Busy gardeners, simple automation | Convenient and repeatable | Still needs checking and seasonal adjustment |
If you want the shortest path to success, start with drip irrigation for a border or veg bed. It is usually the easiest way to see a clear difference without turning the garden into a project that never ends. A good first win builds confidence, and confidence matters more than people admit.
Case Study or Real-World Example
Imagine a typical mid-sized UK back garden: a small patio, two border beds, a raised veg patch, and a handful of containers tucked along the fence. The owner waters by hand after work, but by mid-summer the containers are drooping, the tomatoes are uneven, and the border at the far end keeps drying out first.
The solution does not need to be elaborate. In this kind of setup, a basic drip line can run through the veg patch and into the border, with a short separate line for pots near the patio. A timer handles early-morning watering, while the containers get a little extra attention on the hottest days. Mulch is added to the border, and the hose route is clipped neatly out of the way. Nothing flashy. Just practical.
What changes? Watering becomes regular, the vegetables settle more evenly, and the owner stops doing that last-minute panicked sprint around the garden with a can. That is the real appeal of irrigation. It removes friction. The garden still needs care, of course, but less of the frantic kind.
In a smaller garden, the story may be even simpler. One water butt, one short drip line, and a timer can transform a sunny corner that used to wilt every afternoon. Small setup, big difference. A little dull, maybe. Very effective though.
Practical Checklist
Use this before you buy anything or start fitting parts.
- Identify the plants or areas that need watering most.
- Measure the length of each run.
- Check your water source and pressure.
- Decide whether drip, soaker, sprinkler, or a mix is best.
- Confirm tubing and connector compatibility.
- Plan for a filter if using stored rainwater.
- Choose whether you need a timer.
- Make sure the route avoids trip hazards and damage points.
- Test the system before securing it fully.
- Review watering after the first few uses.
- Adjust for weather, soil type, and plant growth.
If all of that feels like a lot, it is still easier than rescue-watering a whole bed in a heatwave. And far less stressful.
Conclusion
A basic irrigation setup does not need to be complicated to be useful. In fact, the simplest systems often work best because they are easier to install, easier to maintain, and easier to adapt as your garden changes. For UK gardeners, that flexibility is a real advantage. Weather swings, changing soil moisture, and varied planting all make a strong case for water delivery that is steady, targeted, and sensible.
Start small, test carefully, and build from there. If you focus on the plant's needs rather than the gadget's features, you will make better choices and waste less time. That is the kind of gardening upgrade that quietly pays you back week after week. One less chore, one more healthy border. Hard to argue with that.
Get a free quote today and see how much you can save.
Frequently Asked Questions
What is the easiest irrigation system for a beginner gardener in the UK?
For most beginners, a simple drip line or soaker hose is the easiest place to start. It is straightforward to install, gentle on plants, and well suited to borders, raised beds, and vegetable patches. You do not need to fully automate it on day one, either.
Do I need a pump for a basic garden irrigation system?
Not always. If you are using mains water and the pressure is adequate, a pump may not be necessary. If you are relying on a water butt or another low-pressure source, a pump can help, but it depends on the layout and number of emitters. Keep it simple unless the setup clearly needs more pressure.
Can I use rainwater for irrigation?
Yes, and many gardeners do. Rainwater is often a sensible choice for borders and veg beds. Just remember that stored rainwater can carry small debris, so a filter is helpful. You may also need to think about pressure if the system is gravity-fed.
How often should I water with an irrigation system?
There is no single rule because it depends on soil, plant type, weather, and season. Container plants usually need more frequent watering than borders. Newly planted areas also need closer attention. Start with shorter, regular watering and adjust by watching the soil rather than sticking to a rigid routine.
Is drip irrigation better than sprinklers for UK gardens?
Often, yes, especially for beds and borders. Drip irrigation delivers water closer to the roots and usually wastes less. Sprinklers can still make sense for larger open areas or lawns, but they are less targeted and can lose more water to evaporation or overspray.
How much does a basic irrigation setup cost?
Costs vary widely depending on the size of the garden, the number of zones, and whether you add a timer or pump. A small setup can be fairly modest, while a larger or more automated one will cost more. The best approach is to price the parts you actually need instead of guessing from a generic kit.
Can I install irrigation myself?
Yes, many domestic garden systems are well within the reach of a confident DIY gardener. The key is planning carefully and testing the system before you commit to the final layout. If the setup involves complex pressure issues, a shared water supply, or electrical components, it may be worth getting help.
What should I avoid when installing garden irrigation?
Common mistakes include using too many emitters on one line, ignoring pressure, placing pipes where they will be damaged, and assuming the schedule will never need changing. A good system is adaptable. If you cannot tweak it, it will probably annoy you later.
Do I need to bury irrigation pipes?
Not necessarily. Many basic systems work perfectly well laid on the surface and held down with stakes. Burying can make the finish neater in some gardens, but it is not required for every setup. Surface routing also makes maintenance easier, which is no small thing.
What plants benefit most from irrigation?
Newly planted shrubs, vegetables, container plants, hanging baskets, and dry sunny borders often benefit most. These are the areas that tend to suffer first when the weather turns warm. If you have a lot of mixed planting, focus first on the sections that dry out fastest.
How do I know if my irrigation system is working properly?
Check the soil around the root zone rather than just looking at the surface. If the soil is evenly moist, not waterlogged, and the plants look healthy, you are on the right track. Uneven watering, dry patches, or pooling usually mean the layout or timing needs adjustment.
Should I disconnect irrigation in winter?
In many UK gardens, it is sensible to drain and protect exposed components before hard frosts arrive. That can help prevent damage to hoses, fittings, and timers. Follow the manufacturer's guidance, because some parts are more frost-sensitive than others.